
Xero tracking categories let you split your Profit & Loss by two business dimensions — department, location, product line, channel — without touching your chart of accounts. According to Xero Central, you can have two active tracking categories at any time, each holding multiple options. You apply them at the line-item level on invoices, bills, bank transactions, and manual journals, which means a single invoice can split revenue across two different tracking options on separate lines.
Pro Tip: Decide your two tracking dimensions before you create a single category. Changing the structure mid-year forces you to re-tag historical transactions or live with inconsistent reports.
Xero tracking categories are most effective when you choose two decision-relevant dimensions before setup, keep option lists under 20, and assign a named owner to maintain the structure quarterly.
| Point | Details |
|---|---|
| Two-category limit | Xero allows a maximum of two active tracking categories, each with up to 100 options. |
| Line-item application | Apply tracking options at the line-item level on invoices, bills, bank transactions, and manual journals. |
| Reporting power | The P&L by tracking category comparison shows each option as a separate column for side-by-side segment analysis. |
| Governance is critical | Assign an owner, document naming conventions, and audit quarterly to prevent option drift and inconsistent tagging. |
| Priceandaccountants | Offers Xero setup, management accounts, and ongoing bookkeeping support tailored to UK SMEs and tech startups. |
The path in Xero is: Accounting → Advanced → Tracking categories. From there, the process is straightforward.
Naming conventions matter more than most people expect. Short, consistent labels keep reports readable. “Lon” and “London” look similar but create two separate options in your P&L columns. Agree on a standard before you start.
Pro Tip: Create your categories in a Xero demo company first, run a few test transactions, and confirm the reports look right before applying the structure to your live file.
Xero Central confirms that tracking options can be applied at the line-item level on the following transaction types:
The line-item level is the key detail. A single invoice to a client can have three lines — one tagged “London”, one “Manchester”, one “Birmingham” — so the revenue splits correctly across your P&L segments without needing three separate invoices.
Using bank rules to automate tagging is one of the most time-saving features available. If you receive a monthly payment from a specific client or pay a recurring supplier, a bank rule can assign the tracking option automatically on reconciliation. Setting bank rules with tracking options ensures recurring transactions are coded consistently and cuts manual tagging work significantly.
Pro Tip: Standardise payee names in your bank feed. A rule built on “Amazon Web Services” will not catch “AWS” or “Amazon WS” — inconsistent payee names are the most common reason bank-rule automation breaks down.
Xero’s financial reporting supports tracking filters across several key reports. The most useful for management accounts are:
The “Compare by” or column view in the P&L is the report most clients find transformative. You stop asking “how did the business do?” and start asking “which location drove the margin improvement?” That is a different, more useful question.
Practical analyses worth running regularly:
The two-category, 100-options limit shapes how readable these reports are. A P&L with 40 columns is technically possible but practically useless. Keeping options compact — practitioners recommend staying under 20 per category — keeps the comparison view legible.
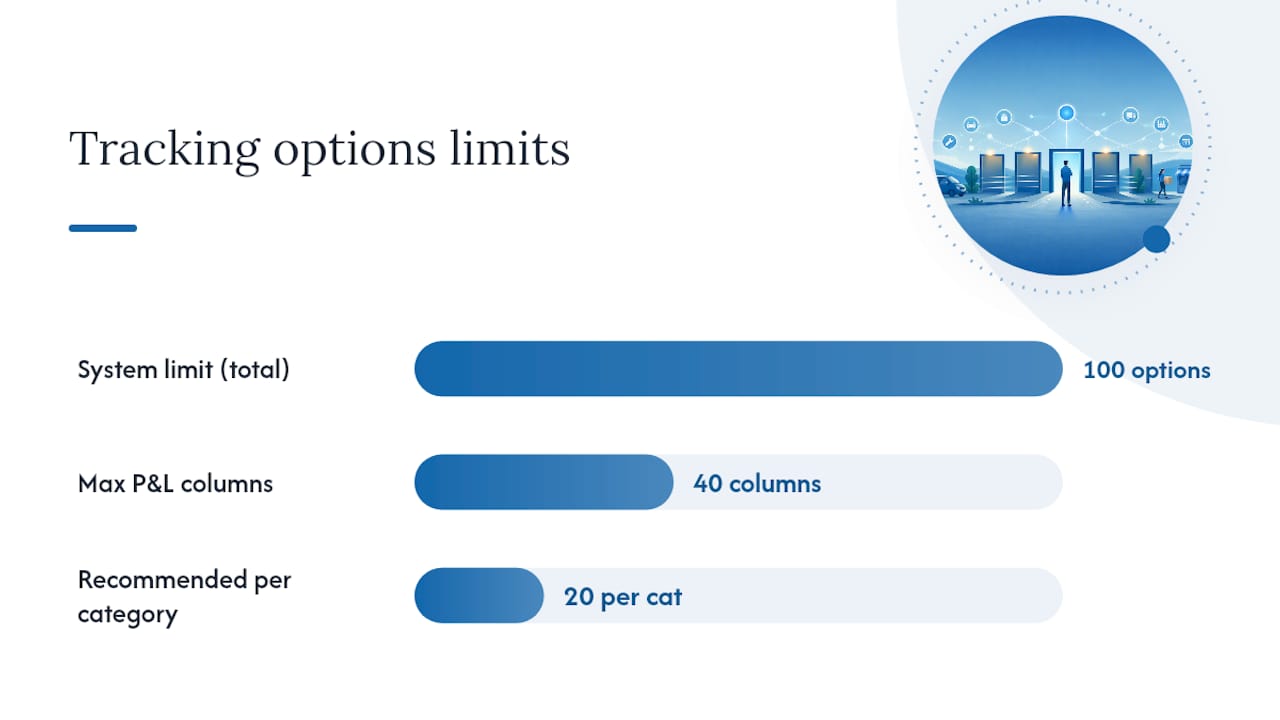
The strategic rule is simple: pick the two segments that most directly influence your decisions. If you run a multi-site retail business, location and product category probably matter more than anything else. If you run a professional services firm, client and service line are the obvious choices. Tracking categories deliver P&L segmentation without expanding the chart of accounts — but only if the two dimensions you choose are genuinely decision-relevant.
Governance is where most small businesses fall short. A few rules that prevent the slow decay of a well-designed setup:
Common pitfalls to avoid:
Pro Tip: Before rolling out organisation-wide, run one full monthly management pack using the new tracking structure. If the reports answer the questions you actually ask, the setup is right. If they do not, fix it before the data accumulates.
These two features solve different problems, and confusing them leads to frustration.
Xero Projects is designed for job-level time and cost tracking. It captures staff time, expenses, and invoices at the individual project or job level, and calculates job-level margin including labour. Use it when you need work-in-progress visibility, time capture, or per-job profitability that includes staff cost allocations.
Tracking categories are for P&L segmentation across many transactions. They answer questions like “which of our three offices is most profitable?” or “which product line has the best gross margin?” They do not capture time, and they do not calculate WIP.
For agencies and professional services firms, combining Client and Project tracking categories gives usable client-level P&L inside Xero reports, even though Xero does not natively calculate WIP or retainer burn. That is a real limitation worth knowing before you design your setup.
Pro Tip: Use Projects for detailed job accounting and tracking categories for the higher-level segmentation that feeds your monthly management pack. They complement each other rather than compete.
Hard limits to know:
Editing and archiving:
You can rename a tracking category or option at any time. Renaming an option updates it on all historical transactions retroactively, which is useful for correcting a typo but dangerous if you are genuinely changing what the option represents. Archiving an option removes it from transaction dropdowns but preserves it in historical reports. Deleting an option is permanent and removes it from historical data — avoid deletion unless the option was created in error.
To archive an option: go to Accounting → Advanced → Tracking categories, click the option, and select “Archive”.
Common troubleshooting:
Pro Tip: Make structural changes at a logical breakpoint — quarter-end or the start of a new financial year. Document the change with a date and reason so your auditor and future bookkeeper understand why the report columns shift.
The right setup depends on the questions you most need to answer. Here are practical starting points for five common UK business types, with option counts kept within the recommended under-20 guideline:
| Business type | Category 1 | Category 2 | Why it helps |
|---|---|---|---|
| Retail (multi-site) | Location | Product category | Compares store-level margin and identifies which product lines drive profit at each site |
| Marketing agency | Client | Service line | Gives client-level P&L and shows which services (SEO, paid media, creative) are most profitable |
| E-commerce | Sales channel | Product range | Separates Amazon, Shopify, and wholesale margin; highlights which range performs best per channel |
| Professional services | Department | Service type | Tracks revenue and cost by team (tax, audit, advisory) and by service offering |
| Construction / trades | Project type | Region | Segments residential vs commercial margin and compares performance across geographic areas |
For agencies specifically, using “Client” and “Project” as the two categories gives client-level profitability inside standard Xero reports. The caveat: Xero does not calculate retainer burn or WIP natively, so you will need Xero Projects or a separate tracker for those figures.
Keep option lists tight. A retail business with 12 store locations and 8 product categories has 20 options across two categories — clean, readable, and maintainable. The same business with 35 store locations would need to consider grouping by region rather than individual site.
Pro Tip: Schedule the first audit one month after rollout and a governance review every quarter. Tracking categories degrade quietly — unused options accumulate, naming drifts, and within a year the reports stop answering the questions they were built for.
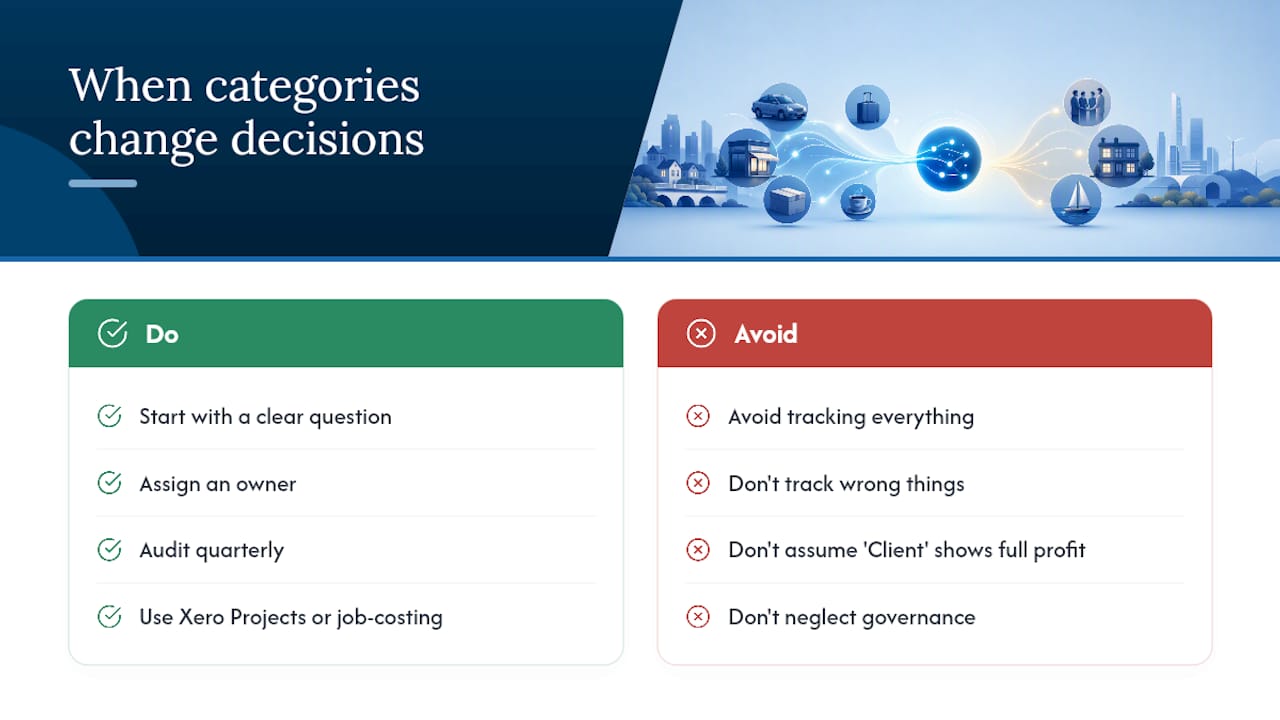
Most businesses that come to us with a Xero setup already in place have one of two problems. Either they have no tracking categories at all — so their P&L is a single undifferentiated block — or they have set up categories that track the wrong things and now have years of inconsistently tagged data they cannot trust.
The businesses that get the most value from tracking categories are those that started with a clear question: “Which of our offices is profitable enough to expand?” or “Is our agency retainer work more profitable than project work?” Those questions have a natural answer in a well-structured P&L comparison. The businesses that struggle started with “let’s track everything we can” and ended up with 60 options across two categories that nobody maintains.
There is a real limitation worth being honest about. Tracking categories do not solve WIP accounting, retainer burn tracking, or balance-sheet segmentation. We regularly see founders assume that adding a “Client” tracking category will give them a full client profitability picture — it gives them revenue and direct costs, but not time cost unless staff time is captured separately. For that, Xero Projects or a dedicated job-costing tool fills the gap.
The governance piece is where most small businesses underinvest. A tracking setup without an owner and a quarterly audit is a setup that slowly becomes useless. We treat it the same way we treat bookkeeping best practices for UK tech startups: the system only works if someone is responsible for keeping it clean.
Getting tracking categories right the first time saves months of re-tagging and report confusion later. Priceandaccountants works with UK tech startups and growing SMEs to design Xero setups that answer the questions founders and directors actually ask — not generic chart-of-accounts templates that fit nobody well.

Our bookkeeping and Xero setup service covers category design, naming conventions, bank rule configuration, and a first management pack review so you can see the reports working before we hand over. For businesses that want ongoing support, our outsourced accounting service includes monthly management accounts with tracking category analysis built in. We have helped over 20 startups, some now valued at over £50m, build the financial reporting infrastructure that supports fundraising and growth decisions. If you want a setup review or a clean implementation from scratch, get in touch with the team at Priceandaccountants to discuss what your business needs.
The following official and practitioner resources are worth bookmarking if you plan to implement or audit tracking categories:
This article is general information, not a substitute for advice from a qualified financial advisor. Consult a qualified financial professional about your own circumstances before acting on anything here.